
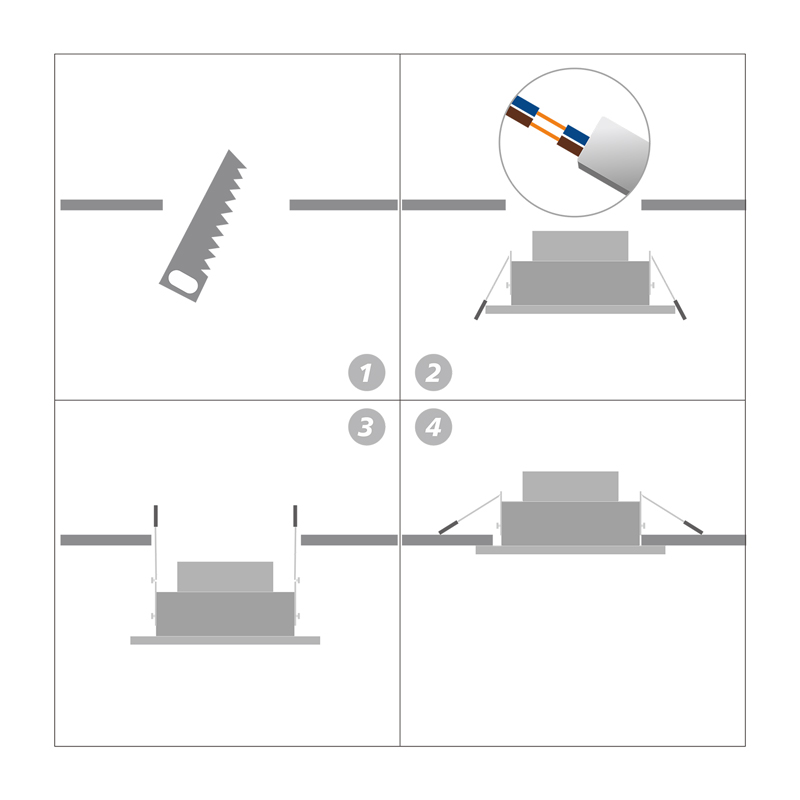
1. Opening: Because downlights generally use embedded installation methods, holes must be made in the ceiling before installation. The size of the holes must be determined according to the size of the downlight. Before opening the hole, it is best to measure the exact size of the downlight in advance, and then drill the corresponding mounting holes in the ceiling.
3. Wiring: Before embedding the downlight into the hole in the ceiling, you need to connect the wires inside the downlight. Connect the live wire reserved in the hole to the live wire that comes with the downlight, and connect the neutral wire to the neutral wire. At this time, you also need to pay attention to the fact that the power supply must be turned off when wiring, otherwise there will be a risk of electric shock. After the wires are connected, in order to avoid leakage during use, it is best to wrap them with insulating tape, and turn on the power to confirm whether the wires are in good contact.
4. Adjustment: There will be springs at both ends of the downlight for fixation. By constantly adjusting the springs, the height of the downlight can be determined and fixed. Before fixing, you need to adjust the height of the downlight and the embedded size. You must ensure that the height of the spring blade is consistent with the thickness of the ceiling, otherwise it will be difficult to fix.
5. Install the light bulb: After adjusting the height, you can install the light bulb. There will be a special place for installing the light bulb inside the downlight. After the light bulb is fixed, open the light card and embed the downlight into the hole.
Post time: Feb-22-2024